I wanted to replace the cheap plastic side tables I had in the play area with some to match my Chimney Block Benches, so I designed these which are about half the length of the benches and as wide; basically a square. They are sturdy enough to accommodate extra seating if needed.
Materials
2X6X8 Pressure Treated Boards (2 for each table)
1X4X8 Pressure Treated Boards (2 for each table)
2 1/2" Coated Deck Screws (3 in each corner of the 2X6s, 2 in each end of the braces total of 20)
1 5/8" Coated Deck Screws (1 in each area of the 1X4s, 4 for each board, total of 24)
Deck Stain and Sealer
Chimney Blocks (1 for each table) …(Optional)
Exterior Latex Paint (only if using the chimney blocks)
Tools
Power Miter Saw
Table Saw
Power Drill
Countersink bit
Screw bit
Small Square
Corner clamps or Band Clamp
Pipe Clamps
Paint Brush or Roller
 |
Cut the boards as shown in this image. Note….these are not to scale, just a rough estimate. |
 |
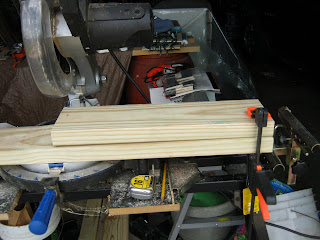
I used my first cut board as a pattern to make sure all the boards of each length were the same length. |
 |
Here, I used a stop block to measure and cut the 1x4 boards, since there were quite a few. |
 |
| Work on a level surface. |
 |
| Cut all the boards prior to assembly. |
Make a box frame
 |
| Make a box frame by screwing (1) 20" board on each end of (2) 17" boards, with the 2 1/2" screws. |
 |
| Use the square to make sure all your corners are 90°. |
It looks best if you countersink all your screws.
Attach inside bracing.
 |
| Screw (2) 17" boards each 4 1/2” from the center of the frame, so you have a 9” space in the center. |
Make sure the tops of the boards are flush (even) with the top of the frame.
Attach the top boards.
 |
| Attach the 1x4's to the top of the frame;overlapping the sides an equal distance all around. |
 |
| You may find the easiest way is to place all the boards and clamp them in place; then screw them down. |
 |
| Use (1) 1 5/8" screw in each board, over each 2X6 (total of 4 per board). |
Attach the legs.
Rip the (2) 16" boards in half on the table saw, (you'll end up with Just over 2 1/2" width boards). Clamp (1) 2 x 2 1/2 x 16 to each corner and screw in place, (2) screws in each side (4 total in each leg). Sorry, but I forgot to take pics of this step.
After the wood has "dried" for about a month, it can be stained and sealed. Use it as is until then. I had the wood laying in the garage for over a month, so I stained them right away. I used a deck stain/sealer in one that I had left over from the deck years ago.


I originally wanted these to just sit on chimney blocks to match my Chimney Block Benches. However; I didn’t think they would be stable enough, that the kids wouldn’t knock them over onto themselves, so I added legs. Turns out the legs are sturdy enough and the chimney blocks are overkill.
After the wood has "dried" for about a month, it can be stained and sealed. Use it as is until then. I had the wood laying in the garage for over a month, so I stained them right away. I used a deck stain/sealer in one that I had left over from the deck years ago.
Optional instructions for using chimney blocks.
You will need to paint the blocks with exterior paint, or if you prefer, you can leave them unpainted for a more rustic look. Stand the chimney blocks on end and place the seat over the blocks, so they fit into the 9" spaces underneath. I like it better without the chimney blocks. |
| With chimney block from end |
 |
With chimney block from side |


Great project! I love your that your instructions are always easy to follow and complete. Thanks for linking up.
ReplyDelete@ Sandra,Thanks. I like to get ideas off the internet and I love the ones that take me step by step, so I figured I would do the same.
ReplyDeleteTru, these are terrific! I think I may need to swipe this idea!
ReplyDeleteGo ahead, Sunny. That's what I put them on here for.
ReplyDelete