I really like getting feedback and will respond to comments.

So please, won't you leave me some footnotes!

Better yet.......... Become a follower!

I'll follow you back!

Do You See What I See? Check out the images I've found!
Print Friendly and PDF

Wednesday, January 25, 2012

Card Wallet

I have all these cards in my purse, over and above my debit and credit cards, which I keep with my checkbook.

So these include store reward cards (cards you use instead of having coupons), library card, AAA card, and the like; you get the picture.

Previously I had these in one of those photo holders. You know the kind, thin, plastic, that comes with a wallet. Anyhoo, it has been worn out for a while now from putting the cards in and out. I mean seriously worn out as in most of the pockets were ripped and my cards and pics would fall out when I was trying to get one of the cards out.

So, enough was enough, when I realized I had lost one of my store cards and had to get it replaced.  I got the inspiration and tutorial from Pinterest of course. 

Here’s the pin on my “Things I'd Like To Make Or Just Find Interesting” board if you’re interested: http://pinterest.com/pin/83105555593591545/ While you’re there, why don’t you become a follower? I’ll always follow back at least one of your boards that interest me.

You can find the tutorial for this card wallet  at Nancy's Couture. I didn’t do another tutorial, because I think she did a wonderful job of it, so she gets the credit.

So, here’s my version

                                 100_0020         100_0021 

I didn’t add the snap, because this is always in my purse, so I didn’t feel I needed one. As you can see, I don’t have enough cards to fill it, so I finished it out with pics of my grandkids.

On a side note, I used a couple of my Christmas and Birthday presents to do this project.  These were both from Gary. The first is my new self healing cutting mat, which you can see in the background of the above pics. It is 24”X36”! I have a little dinky one that just wasn’t big enough for a lot of the projects I do and I have a larger cardboard sewing mat that you just can’t do any cutting on except with a scissors.

This is the kind of mat I got.  As you can see it is black on the other side. You can buy it at Amazon.


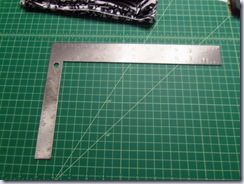
The second gift I used is a 12”X8” carpenter square. I’ve been wanting a smaller square for some time, but whenever I would go shopping I would forget to either put it on the list or simply forget about it. Outta sight, outta mind as it were. As you can see it is not very expensive at Amazon; although he got  it at  the local True Value hardware store.

100_0022

So that’s what I did this afternoon. It only took a couple of hours, including writing on the blog about it. In fact the writing probably takes longer, since I write, read, reread, rewrite and so on, until I get it just the way I want.

Have a great evening!

Thursday, January 5, 2012

Betty Crocker 11 Piece Decorating Kit

My daughter and her family got me this for Christmas. I guess she thought I needed some more decorating paraphernalia, since she recently borrowed some of mine and I do seem to be missing some pieces. Anyway,  I had seen decorating tubes like this on the web, but was reluctant to get them, because I thought they might be more difficult to clean.

                    IMG_1238                      

Now, it says it is 11 piece, but in actuality, there are 23 pieces, plus the instruction booklet. They count each bottle, with all the pieces to the cap as 1 piece. Most things you buy nowadays, the cap is considered a piece of it’s own, but potatoes, pattatoes, makes no difference to me.

This is what’s included:

 IMG_1240

3 accordion style bottles

1 tall, smooth bottle                                                                                            

4 (3 piece) caps, which include the bottle cover that screws on, a tip retainer nut, which also screws on, and a tip cap which snaps over the retainer nut

1 spoon spatula

1 flexible angled  spatula

5 decorating tips, including a round #2, leaf #67, open star #16, open star #32, and petal #104

1 instruction booklet

I used it, for the first time,  for a New Years treat of cupcakes. Filling one of the accordion tubes as full as I could, by tapping it to settle the frosting, I could do 5 cupcakes in a spiral style. That’s maybe only a couple less than using a bag, but I did not have to worry about frosting coming out the top, which I tend to have, because I probably am not doing something quite right with my hold.

So, to fill the bottle, use the spoon spatula and start scooping frosting into the bottle, scraping off the spatula on the side of the bottle. Tap the bottle several times on the counter/table and repeat process until you can’t get anymore in.  Screw on the bottle cap, put a tip on, and screw on the retainer nut. IMG_1246

You are now ready to start decorating with one hand holding a cupcake and the other (dominant) hand holding the bottle. Place the end of the tip on the edge of a cupcake and start squeezing the bottle, as you rotate either the cupcake or your bottle hand, whichever feels most comfortable to you. Spiral in toward the middle of the cupcake, keeping the rows tight and stop in the middle and then lift off.

I thought it worked quite well, but here are my pros and cons.

PROS:

Can frost using only 1 hand; I generally use 2 hands with a bag.

Don’t have to worry about frosting squeezing out the top.

If you need to chill the frosting, you can just put the cap on and put the bottle in the fridge for a bit.

Can store the leftover frosting right in the bottle and use it up in a few days, so you don’t have to throw any out or save such a small amount in another container. I used it on donuts a couple of days later.

By soaking it in warm, soapy, it was no harder to clean out than a bag.

CONS:

The flexible angled spatula is pretty useless for scooping up frosting or even doing any spreading. It is just too flexible and I will stick with my metal ones for major decorating. It did; however, work good to scrape out the pleats of the accordion bottle when I was cleaning out the last of the frosting for my donut; not completely, but good enough.

IMG_1244

Would have been handy to have a large round tip for cupcakes, but I already have a couple, so that was no big deal.

The biggest drawback I had was that you cannot use larger diameter tips for bigger open star decorating. What I mean is that I like to use the following tips (4B, 8B, & 1M) when decorating cupcakes, because I have to make less spirals and it is more dramatic looking. These have a larger diameter opening at the base and there is no way to secure them to the bottle. With a bag, you just have to cut a larger hole.

In conclusion, I give this a thumbs up!

I think it will be handier for doing star decorating on cakes where you have a lot of little stars to pipe. I will definitely be using it on my next decorating project. I wonder how writing will work with it. I can’t wait to try it on a cake.

Have A Sweet Day!