If you enjoy reading my posts, leave a comment at the bottom.
I really like getting feedback and will respond to comments.
So please, won't you leave me some footnotes!
Better yet.......... Become a follower!
I'll follow you back!

This is the hat my daughter put on one of my Pinterest boards for my granddaughter.
Cute, but no pattern.
Not even a link to the page the image came from.
All I got was redirected to different ad sites.
This is a hat that I liked the earflaps on.
Again, no pattern.
The link takes me to the LoveAndYarn site, but no amount of searching found me a pattern.
So, when the internet gives you lemons, make lemonade.
Or in this case make my own pattern.
So here's the pattern:
Girl's Hat With Lacy Earflaps
Supplies
4-ply yarn - less than 1/2 a skein of the main color and even less of the contrasting colors *
*(this is not an exact science, I used yarn I had left in my stash from other projects)
This is the type I use
Size I crochet hook
Large needle to weave in any ends and sew on flower
Size
Child - I made it to fit big on a 5 year old, so I would imagine it will fit up to a teenager, possibly. It fit the circumference on me, stretched, but did not go down enough to cover the ears.
Stitches used
ch - chain
sl st - slip stitch
sc - single crochet
hdc - half double crochet
dc - double crochet
dtr - double treble crochet
Pattern
Round 1 - With the I hook and main color, ch4. sl st into 1st ch, to form a circle.
Round 2 - Work 10 hdc into circle. (10 stitches) Mark end of round.
DO NOT JOIN
Round 3 - 2 hdc in each st around. (20 stitches) Move stitch marker.
Round 4 - * 1 hdc next st, 2 hdc next st. Repeat from * around. (30 stitches) Move stitch marker.
Round 5 - * 1 hdc next st, 1 hdc next st, 2 hdc next st. Repeat from * around (40 stitches) Move stitch marker.
Round 6 - * 1 hdc next st, 1 hdc next st, 1 hdc next st, 2 hdc next st. Repeat from * around (50 stitches) Move stitch marker.
Round 7 - * 1 hdc next st, 1 hdc next st, 1 hdc next st, 1 hdc next st, 2 hdc next st. Repeat from * around (60 stitches) Move stitch marker.
Round 8 - 13 - Work even in hdc around, moving stitch marker at end of each round.
Round 14 - 15 - Attach next contrasting color and work even in hdc around, moving stitch marker at end of each round. You can crochet your ends in as you go, or weave them in at the end. I prefer to crochet in as many as possible right away, so there's less weaving to do at the finish.
Round 16 - Attach next contrasting color and work even in hdc around, moving stitch marker at end of round.
Round 17 - (Earflap round) hdc in next 9 st. *sl st in next st, sk 3 st, 10 dtr in next st, sk 3 st, sl st in next stitch* (earflap made). hdc in next 24 st. Repeat between *. hdc in last 9 stitches of row. Move stitch marker.
Round 18 - Attach main color again and hdc in next 9 st, *hdc in sl st, 2 hdc in each dtr, hdc in sl st*, hdc in next 24 st. Repeat between * hdc in last 9 st. Move stitch marker.
Round 19 - hdc in next 3 st, move stitch marker (this is so your color changes end up in the back), then sc around to marker. sl st to next st and fasten off.
Weave in any tails you have left.
Flower
Large
Petals:
Round
1 - Using H hook ch 4. sl st into the first ch to form
a
circle, ch 2. *1 dc into the circle, ch 1. Repeat from the *
5
times. sl st into the top of ch 2.
Round
2 - ch 2, then dc into the same st. 2 dc
into every st
and ch
all the way around. sl st into the top of ch 2.
Round
3 - Ch 2, then dc into the same st. dc
into the next st. *2 dc into the next st, then dc into the next 2 sts. Repeat
from the * all around. sl st into the top of ch 2.
Round
4 - Ch1. *sc into the next st, dc into the same st. In the next st 2 dc. 3 tr in the next st. 2 dc into the next st. 1 dc in the next st
and sc into the same st. Repeat from the * all around. sl st into the top of ch
2.
Fasten
off, and weave in ends.
Medium
Petals:
Round
1 - Using H hook ch 4. sl st into the first ch to form a circle, ch 2. *1 dc
into the circle, ch 1. Repeat from the * 5 times. sl st into the top of ch 2.
Round
2 - ch 2, then dc into the same st. 2 dc
into every stitch and ch all the way around. sl st into the top of ch 2.
Round
3 - Ch 1. *sc into the next st. dc into
the same st. 1 dc into the next st, then tr, dc into the same st, dc in the
next st, then sc into the same st. Repeat from the * all around. sl st into the
top of ch 1.
Fasten
off, and weave in ends.
Small
Petals:
Round
1 - Using H hook ch 4. sl st into the first ch to form a circle, ch .14 dc into
the circle. sl st into the top of ch 2.
Round
2 - Ch 2. *1 dc into the same st. 3 dc into the next st. dc in the next st, ch
2 and sl st into that same st. sl st into the next st, ch 2. Repeat from the *
all around.
Fasten
off and weave in ends.
Finishing
Place small petals on top of medium petals, then on top of large petals. Going through all layers, sew to one side of the hat with yarn and a large needle. Before cutting yarn, attach a button to the center of the flower and secure on the inside of the hat and fasten off.
Braids
Cut (12) 36" lengths of yarn for each braid. Fold 12 pieces of yarn in half and using a large hook, pull the fold through a space at the bottom of each earflap from the backside, to form a loop on the outside. pull the rest of the tails through the loop and tighten. Split the tails into 3 sections and braid almost to the end. Wrap a length of main color yarn around the end of the braiding and secure. Trim ends of the tail to about the same length.
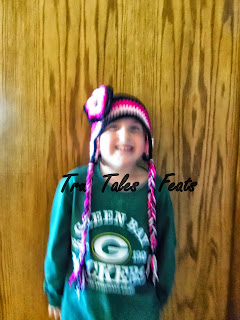
My grandson was kind enough to model this hat for me, but I'm afraid I did a poor job focusing. Darn this getting old and having to hold the camera farther away than my arms to see if I got a good pic or not!
Here's my granddaughter modeling it after her birthday.
And of course these two had to get crazy for the camera. Even though it's not a great pic, I decided to throw it in here anyway.
Here's my granddaughter modeling it after her birthday.
And of course these two had to get crazy for the camera. Even though it's not a great pic, I decided to throw it in here anyway.


