
I really like getting feedback and will respond to comments.

So please, won't you leave me some footnotes!

Better yet.......... Become a follower!

I'll follow you back!

Do You See What I See? Check out the images I've found!
Print Friendly and PDF
Showing posts with label DIY. Show all posts

Wednesday, January 25, 2012

Card Wallet

I have all these cards in my purse, over and above my debit and credit cards, which I keep with my checkbook.

So these include store reward cards (cards you use instead of having coupons), library card, AAA card, and the like; you get the picture.

Previously I had these in one of those photo holders. You know the kind, thin, plastic, that comes with a wallet. Anyhoo, it has been worn out for a while now from putting the cards in and out. I mean seriously worn out as in most of the pockets were ripped and my cards and pics would fall out when I was trying to get one of the cards out.

So, enough was enough, when I realized I had lost one of my store cards and had to get it replaced.  I got the inspiration and tutorial from Pinterest of course. 

Here’s the pin on my “Things I'd Like To Make Or Just Find Interesting” board if you’re interested: http://pinterest.com/pin/83105555593591545/ While you’re there, why don’t you become a follower? I’ll always follow back at least one of your boards that interest me.

You can find the tutorial for this card wallet  at Nancy's Couture. I didn’t do another tutorial, because I think she did a wonderful job of it, so she gets the credit.

So, here’s my version

                                 100_0020         100_0021 

I didn’t add the snap, because this is always in my purse, so I didn’t feel I needed one. As you can see, I don’t have enough cards to fill it, so I finished it out with pics of my grandkids.

On a side note, I used a couple of my Christmas and Birthday presents to do this project.  These were both from Gary. The first is my new self healing cutting mat, which you can see in the background of the above pics. It is 24”X36”! I have a little dinky one that just wasn’t big enough for a lot of the projects I do and I have a larger cardboard sewing mat that you just can’t do any cutting on except with a scissors.

This is the kind of mat I got.  As you can see it is black on the other side. You can buy it at Amazon.


The second gift I used is a 12”X8” carpenter square. I’ve been wanting a smaller square for some time, but whenever I would go shopping I would forget to either put it on the list or simply forget about it. Outta sight, outta mind as it were. As you can see it is not very expensive at Amazon; although he got  it at  the local True Value hardware store.

100_0022

So that’s what I did this afternoon. It only took a couple of hours, including writing on the blog about it. In fact the writing probably takes longer, since I write, read, reread, rewrite and so on, until I get it just the way I want.

Have a great evening!

Thursday, January 5, 2012

Betty Crocker 11 Piece Decorating Kit

My daughter and her family got me this for Christmas. I guess she thought I needed some more decorating paraphernalia, since she recently borrowed some of mine and I do seem to be missing some pieces. Anyway,  I had seen decorating tubes like this on the web, but was reluctant to get them, because I thought they might be more difficult to clean.

                    IMG_1238                      

Now, it says it is 11 piece, but in actuality, there are 23 pieces, plus the instruction booklet. They count each bottle, with all the pieces to the cap as 1 piece. Most things you buy nowadays, the cap is considered a piece of it’s own, but potatoes, pattatoes, makes no difference to me.

This is what’s included:

 IMG_1240

3 accordion style bottles

1 tall, smooth bottle                                                                                            

4 (3 piece) caps, which include the bottle cover that screws on, a tip retainer nut, which also screws on, and a tip cap which snaps over the retainer nut

1 spoon spatula

1 flexible angled  spatula

5 decorating tips, including a round #2, leaf #67, open star #16, open star #32, and petal #104

1 instruction booklet

I used it, for the first time,  for a New Years treat of cupcakes. Filling one of the accordion tubes as full as I could, by tapping it to settle the frosting, I could do 5 cupcakes in a spiral style. That’s maybe only a couple less than using a bag, but I did not have to worry about frosting coming out the top, which I tend to have, because I probably am not doing something quite right with my hold.

So, to fill the bottle, use the spoon spatula and start scooping frosting into the bottle, scraping off the spatula on the side of the bottle. Tap the bottle several times on the counter/table and repeat process until you can’t get anymore in.  Screw on the bottle cap, put a tip on, and screw on the retainer nut. IMG_1246

You are now ready to start decorating with one hand holding a cupcake and the other (dominant) hand holding the bottle. Place the end of the tip on the edge of a cupcake and start squeezing the bottle, as you rotate either the cupcake or your bottle hand, whichever feels most comfortable to you. Spiral in toward the middle of the cupcake, keeping the rows tight and stop in the middle and then lift off.

I thought it worked quite well, but here are my pros and cons.

PROS:

Can frost using only 1 hand; I generally use 2 hands with a bag.

Don’t have to worry about frosting squeezing out the top.

If you need to chill the frosting, you can just put the cap on and put the bottle in the fridge for a bit.

Can store the leftover frosting right in the bottle and use it up in a few days, so you don’t have to throw any out or save such a small amount in another container. I used it on donuts a couple of days later.

By soaking it in warm, soapy, it was no harder to clean out than a bag.

CONS:

The flexible angled spatula is pretty useless for scooping up frosting or even doing any spreading. It is just too flexible and I will stick with my metal ones for major decorating. It did; however, work good to scrape out the pleats of the accordion bottle when I was cleaning out the last of the frosting for my donut; not completely, but good enough.

IMG_1244

Would have been handy to have a large round tip for cupcakes, but I already have a couple, so that was no big deal.

The biggest drawback I had was that you cannot use larger diameter tips for bigger open star decorating. What I mean is that I like to use the following tips (4B, 8B, & 1M) when decorating cupcakes, because I have to make less spirals and it is more dramatic looking. These have a larger diameter opening at the base and there is no way to secure them to the bottle. With a bag, you just have to cut a larger hole.

In conclusion, I give this a thumbs up!

I think it will be handier for doing star decorating on cakes where you have a lot of little stars to pipe. I will definitely be using it on my next decorating project. I wonder how writing will work with it. I can’t wait to try it on a cake.

Have A Sweet Day!

Monday, August 1, 2011

Baptism Cake And Some Helpful Things I Learned From Pinterest

 IMG_0880 I made this cake for a Baptism celebration we attended Sunday.IMG_0881It’s kind of hard to tell, from the picture,  but I made this in the shape of an open book.  IMG_0882 Since I’m too frugal to by a lot of shaped pans, I improvised. I used a 13x9 pan for the bottom layer. For the top, I cut a 9x9 cake on the diagonal, using the top of the cake for one side and then flipped the bottom over for the other side, putting the thick sides to the middle. I had to cut off approximately 2” on each side of the top layer, so the edge was even. This was my first time making and using fondant and I think it turned out quite well.

So, what did I learn from Pinterest? 

I have a board on my Pinterest page called The Been There, Done That Column where I put the tips I’ve tried and projects I’ve copied. These are the tips I used for this project:

 The Best Tip EVER for filling a pastry bag!! @Chef Mommy

REVIEW:  This totally rocks! I wasted so much LESS frosting and cleanup was easier! I could even switch bags, from a large tip bag to a small tip one, just by wrapping another piece of plastic around the original. The only change I made was to knot the back end; thereby, preventing end blowout.

  How to Make Marshmallow Fondant @Clockwork Lemon

REVIEW: I found that constantly dusting your hands with the sugar keeps the fondant from sticking to them better than the butter did. I used a tsp. of vanilla and it tasted good; much better than any bakery fondant. I did find that you have to use a lot of sugar to get it to the point of non stickiness. When rolling this out, I found it works best between 2 pieces of parchment paper, then stick it in the freezer for a few minutes and it comes of quite easily.

 Quick and Easy Smooth Icing Using A Roller @ Cake Central

REVIEW: How to make a smooth frosted cake with a paint roller. This worked best for me with just the roller. 2nd best was with paper toweling. The wax paper did not work with my frosting recipe, stuck to it. I did not try parchment paper.

Do you Pinterest? It’s a great way to bookmark pictures you find on the internet and full of loads of inspiration. Why don’t you check out my Page and maybe become a follower, if you are so inclined.   And if you need an invite, let me know. I’ll gladly send you one.

Warning box

Wednesday, June 29, 2011

Planter Bench From Metal Bed Frame

Remember my plans to make a planter bench out of an old metal bed frame?
Well, here it is:
IMG_0842
It’s part of my new front garden bed. That’s my ice cream sundae totem just to the left.
Basically, what I did was to cut the footboard in half; but it was a little too deep for what I wanted, so I cut off another 6” or so. I was going to prime it and paint it, but decided I wanted a rusty kind of look. Problem was, I had used corner braces to connect it and they were shiny silver. I sprayed the braces and all the nuts and bolts with black paint and then just kind of lightly went over the rest of the bench, kinda feathering it out from the painted hardware. Turned out ok.
IMG_0848Look at that, a spider has already built a web on it. HA!
  I cut the rails to fit the width of the headboard, Gary welded it back together for me and I used the original brackets to attach it across the front. I cut a piece of the other rail to fit across the back and he welded that to a brace that was already there. I did; however have to cut the side pieces down to match up with that back brace. It was too tall on the sides anyway. This looks much better. 
IMG_0842Front
IMG_0847  Back
I stuck a solar light in there, but I keep forgetting to go out front at night to see if it’s even working.
I cut pieces of deck board to fit between the rails and left spaces to slip some oblong planters in. There was just the right space for the planters and I didn’t have to rip any boards down to make it work. How cool is that?! Again I originally was going to paint these boards, but decided to let them weather naturally. Of course for this year, they are going to be golden instead of gray, but it’ll do.
IMG_0852See how the boards fit nicely into the bed rails?
Finally, I drilled holes into the top of the backboard to put in some plant hangers that I cut and bent out of a 1/4” rod. I have Dahlias planted behind the bench, but they are only about 6” tall at this point. I can hardly wait for the plants to fill in some, but it’s looking pretty decent already.
IMG_0850 The planter hangers I just left to rust.
IMG_0851
I am very pleased at how it turned out.
Stay tuned for the complete reveal of the whole garden bed in an upcoming post.
Technorati Tags: ,,
Linking to: 

Tuesday, June 28, 2011

Ice Cream Sundae Totem

This is the totem I made for my new garden bed. I used a small green flower vase inverted to serve as the “holder” to slip over the post (ice cream cup stem). I found these great posts at Menards, which are 60” long and are plastic coated metal hollow rods. I only used 30” for this project, so I have the other 1/2 to use for another totem. I cut them off with a chop saw, but a hacksaw would work as well.

IMG_0845

Here’s how the totem stacked up:

On top of the vase, I adhered a yellow dinner plate and yellow salad plate right side up (bowl of ice  cream cup), followed by a sort of pumpkin shaped white canister upside down, that I had used to keep my utensils in on the kitchen counter (scoop of ice cream). Next came a fluted carnival glass plate we received as a wedding gift 35 years ago. I very seldom used it, except to put candy in once or twice. This also was upside down (caramel topping). A clear cut glass bowl, also upside down came next (whipped cream) and it was topped off with a metal cupola, I guess you would call it, from a lantern candle holder that I made into a solar patio lantern. I spray painted the cupola red to simulate a cherry. I finished off my sundae with a tablespoon, which I cut off 1/3 of the bowl, with a chop saw, and glued to the bottom of the whipped topping.

These are the steps I followed:

First, I marked where the pieces needed to go by tracing them with a marker. I then “sanded” these markings off, with a little over each way;

with a dremel, fitted with a diamond tip bit. This made short work of the task of roughening the areas for the glue to adhere to.

Secondly, I cleaned the area to be glued well with alcohol and a rag.

Starting with the plates, I next applied clear silicon adhesive sealant, liberally to one surface and glued them together. I glued all the top pieces, above the vase, the same day. To attach the spoon, I hammered the bowl of the spoon a little flatter, to be close to the same arc as the whipped topping bowl. I then glued it on with the silicon adhesive and propped it against a tall object until it was set. Worked out ok, so far, but we’ll see how it handles the elements. I then waited a day and turned the piece upside down , placing it on a roll of painter’s tape, so the “cherry” was in the hole; therefore, resting mostly level. I then glued the vase, upside down to the bottom of the dinner plate and waited another day before tipping it over and putting it on the post which I had pounded into the ground.  I used Loctite clear silicon adhesive sealant, but I’m sure there are other brands as well. 

So, here is my ice cream sundae in the new garden bed. It is next to the planter bench I made out of an old metal bed frame. More to come on that another time.IMG_0841

Technorati Tags: ,,

Sunday, May 22, 2011

Address Me As Ms. DIY, If You Please

Just a little project I completed today.
 IMG_0789  
I’ve had these cut out for about a month now, but just waiting for the weather to be warm enough to apply. I bought this vinyl off Ebay and it is supposed to be sign vinyl, so we’ll see how it lasts outdoors. It very little protected under the eaves, and it will get direct sun for part of the day, as well as rain. This will be a good test to see if I want to do something bigger outdoors.

IMG_0792
I washed the area and prepped it with alcohol before applying the vinyl. It seems to have adhered very well.
Here’s  the full effect:
IMG_0793
It doesn’t look like it, because of the slight angle of the picture, but it is centered under the light fixture.        
I think it looks pretty nice.
Now I just have to wash the rest of the siding and maybe repaint those light fixtures.

Have A Nice Afternoon!
Linking to:
Sew Many Ways
Technorati Tags: ,,

Thursday, May 19, 2011

Garden Work….. Finally! A New Flower Bed

The weather has finally been warm enough and dry enough, that I could do some garden work. Not vegetable gardening yet, too cold for that. My tomato plants are still in the make shift greenhouse I fashioned out of hay bales, cattle panels and tarps. Seems to be working ok, but it would be nice to get the plants in the ground.
The garden work I’m referring to is a new flower bed that’s going in the front yard. I worked about 2 hrs. on it yesterday and about 1 1/2 hrs. today.
This is what I have done so far:
 IMG_0778 IMG_0779 
I’m not sure if you can tell, but the lawn is on a slope here. That figures into my bed perfectly.
The first day, I collected the flat rock that will be the border of the bed, laid out the bed, and dug about 1/4 of the sod out. That was enough for one day, since I’m “old”. J/K, the fact is that’s about all my injured leg could handle for one day. the good news is all that stretching  should help my leg to heal faster.
Today, I finished digging out the rest of the sod. I had five loads of sod that I dug out.
IMG_0780
And what did I do with all that sod, you ask? I dumped it in a low area in front of the shed that always fills with water when it rains. It would be a great place for a rain garden, but it’s also an area where the guys tend to park a lot of the farm equipment during the summer months.  Oh, how I would love a rain garden though. Maybe someday, if we ever move to a different home for retirement.
 IMG_0781 IMG_0782 IMG_0783 
So here’s my inspiration for what I envision for the new flower bed:
 
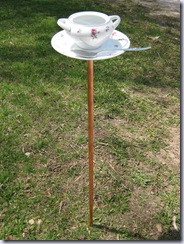
I found this pic on Pinterest. I already have a milk can I can use and I plan to put my metal bed frame planter bench in the vignette also, as soon as I have it built. For the “spilled milk”, I bought some Dusty Miller plants. Hopefully, they will be white enough. The finishing touch will be a tea cup bird feeder.
On another garden related matter, I transplanted some ferns I got from a friend’s property. I transplanted some last year and they came through the winter fine, so I got some more this year. Believe it or not, these ferns were only as tall as the short ones in the pic, just a few days ago (those are the ones I transplanted last year). They seem to grow about 2'” every day!
IMG_0784
They are a pretty tough fern. If you look closely at the pic on the bottom below, you’ll see some green coming in an otherwise dead looking plant, as in the pic on the top.

IMG_0786IMG_0785
The Autumn Fern I bought from Menards last year, on the other hand does look like it has bit the dust. In a cursory inspection, I could not find any signs of returning growth. The label states that there is a 1 year guarantee, so I’ll have to hunt up my receipt and check it out. I don’t know if I have to take the dead plant back or if I just need the receipt. I will have to call and find out.
 IMG_0787 IMG_0788
Have A Great Evening!


Technorati Tags: ,,

Sunday, May 8, 2011

Mother’s Day Gift


Here’s what I made for my MIL for Mother’s Day:
IMG_0747It’s a sugar bowl  bird feeder/waterer

Here’s a closer pic
IMG_0745
I got the inspiration here from a teacup bird feeder tutorial.

I could not find any teacup/saucer combinations I liked, so I went with a sugar bowl. I actually like this better. It has a bigger area for water than a teacup and I could use a bigger plate and spoon that would not look out of place if using a smaller teacup.

Basically, this is how I made it.
1) Plan this for several days in advance, because you need to have the glue cure.
2) Find a nice sugar bowl, plate, and spoon. either of your own or from a thrift store or garage sale.  Mine were matching, but you could certainly do coordinating or even contrasting colors.
IMG_0749           Even my spoon had a rose on it to match the plate.

3) You need to sand around the bottom of the sugar bowl, the bottom of the spoon and the 2 coordinating areas on the plate where they will both sit to roughen it up so the glue will adhere well. I didn’t take pics of the sanding process, but I think it is self explanatory. Just be sure to sand quite a lot of the glaze off.
4) Glue the bowl and spoon to the plate using E-6000 glue. This is some strong glue that is waterproof. Follow the directions on the package. It takes about 24 hrs. to cure before you can flip it over and do the backside.
5) After the glue has cured for a day, turn the  feeder over and glue a 1/2” copper cap in the middle of the plate. Again the surface of both the plate and the cap need to be roughened up with sand paper. Make sure to apply a generous amount of glue to the plate and cap, because the cap is usually convex, so you need to make sure it is going to be held over the entire cap.

IMG_0754
Original way.... didn't work out so well.
** UPDATE **
5) It was not sturdy enough with the E-6000 and just that small area to apply glue to. One twist with my husbands strong hands and it wanted to move too easily. This is what we did to reinforce  the cap and make a larger surface for adhesive. My husband soldered a fender washer to the top of the cap and then filed it to roughen the surface and make it even. Meanwhile, I scraped off the glue from the bottom of the plate and sanded a larger area to accommodate the fender washer size. This time around, I glued it with waterproof epoxy. It dried to a light amber color , but that's ok, since it's underneath and won't be seen. After curing for 24 hrs., it's solid and not going anywhere.
New improved version with a fender washer soldered to the cap
               I didn’t even bother to remove the entire tag, since it will be on the bottom and not show.

       
6) In the meantime; while you wait for this glue on the bottom to cure. You can prepare the stake. This is made from a 36” piece of 1/2” copper tubing. I bought a 10’ piece at the hardware store because I plan to make one of theses for myself as well, but I saw you could get these in 5’ sections also, which were more expensive/ft. Personally, I think I might like more than one of these in my yard. Cut the tubing with a pipe cutter if you have one, or a hacksaw. Sand around one end of the tubing as far as the cap will go on, so that the cap will slide on easily. These are very tight fitting; after all, they are made to hold water. On the other end, hammer the tubing flat , to make a “knife edge”  to poke into the ground easier.
IMG_0749

7) Stick the pipe into the ground about a foot. Once the glue has cured on the back of the plate, you can turn it over, slip it onto the pipe, and fill the bowl with water and put some bird food on the plate.

Here's the bird feeder in my in-laws front yard with bird seed and water.


This is the card I made to go along with her gift:
IMG_0753The envelope I made last year out of a heavy magazine cover.

Here’s a closer look at the card. It is a “Do Not Disturb” hanger for the door.
IMG_0751 I got the inspiration here.


Happy Mother’s
Day
Linking to:
Fine Craft Guild


Photobucket