


This is how I went about trying to figure out where I needed to cut the legs. I used whatever I could find to get my legs to the height I needed for each level. From here I moved my work out to the driveway and put it on a jigged up plywood sheet to have some semblance of an even place to work.

I started with the middle bottom table and worked my way up from there. Those legs I cut off all at the same level, as compared to the table on the right, so I wouldn't have to cut those legs, then went back and started putting my two other bottom layer tables on. I used a torpedo level to make sure the first table was level and leveled off of that one all the way up. It's pretty close , no more than 1/8 of a bubble off, and I'm not so sure that wasn't my plywood jigged on the driveway causing the problem.


Luckily, the two legs I took off that table were the exact height I needed to replace the legs in the table on the other side.
As I cut off legs and added tables, I would rearrange my "supports" and mark for the next table. Again, I used whatever I could find that would give me the right height.
Pay no attention to that man behind the curtain! messy garage. Right now it looks like Dorothy's tornado went through! It'll get straightened up before the snow flies.


And, see that little black L-shaped thing? That's a Clamp-It Assembly Square, that I bought from Rockler several years ago when when Gary and I started building toy boxes for the Grandkids. It comes in very handy and I find myself using it on almost all my woodworking projects. It's made of plastic, so it slides around real nice on your work surface without scratching. Plus, it's smaller than a typical triangle square. Here I used it to make sure my tables were square to each other. I also use it to measure, when I need certain spaces to be the same, by placing a piece of tape on it where I need the measurement to be. Oh, and it can be clamped on to make 90°corners, inside or outside. All in all, a handy little tool.

All I can say is clamp, clamp, clamp and level as you go. You can never have enough clamps.

You can click on this image to make it larger, but what I did here was trace around each leg so I could line up where my holes would be placed for the hanger bolts that would hold the tables together.


I removed any drawers from the tables, filled in the holes with Rock Hard and these will be replaced after they are painted. I replaced them after painting, 'cause I wanted to make sure it was painted under, just in case it would show through the cracks.


The two tables without drawers were just a little too small to fit my final table on top, so I added a piece of 3/4" oak plywood to each so they would be long enough. It gives me added space for plants to boot. I wanted to cover up the plywood, so I added trim molding which we got from an uncle when he was getting rid of excess construction materials from his projects. Never so NO to FREE! WOOHOO! 
This project was taking a long time for various reasons, so it got too cold to paint in the garage, so I had to move my work into my living room. That'll get you to start moving your butt and get things done.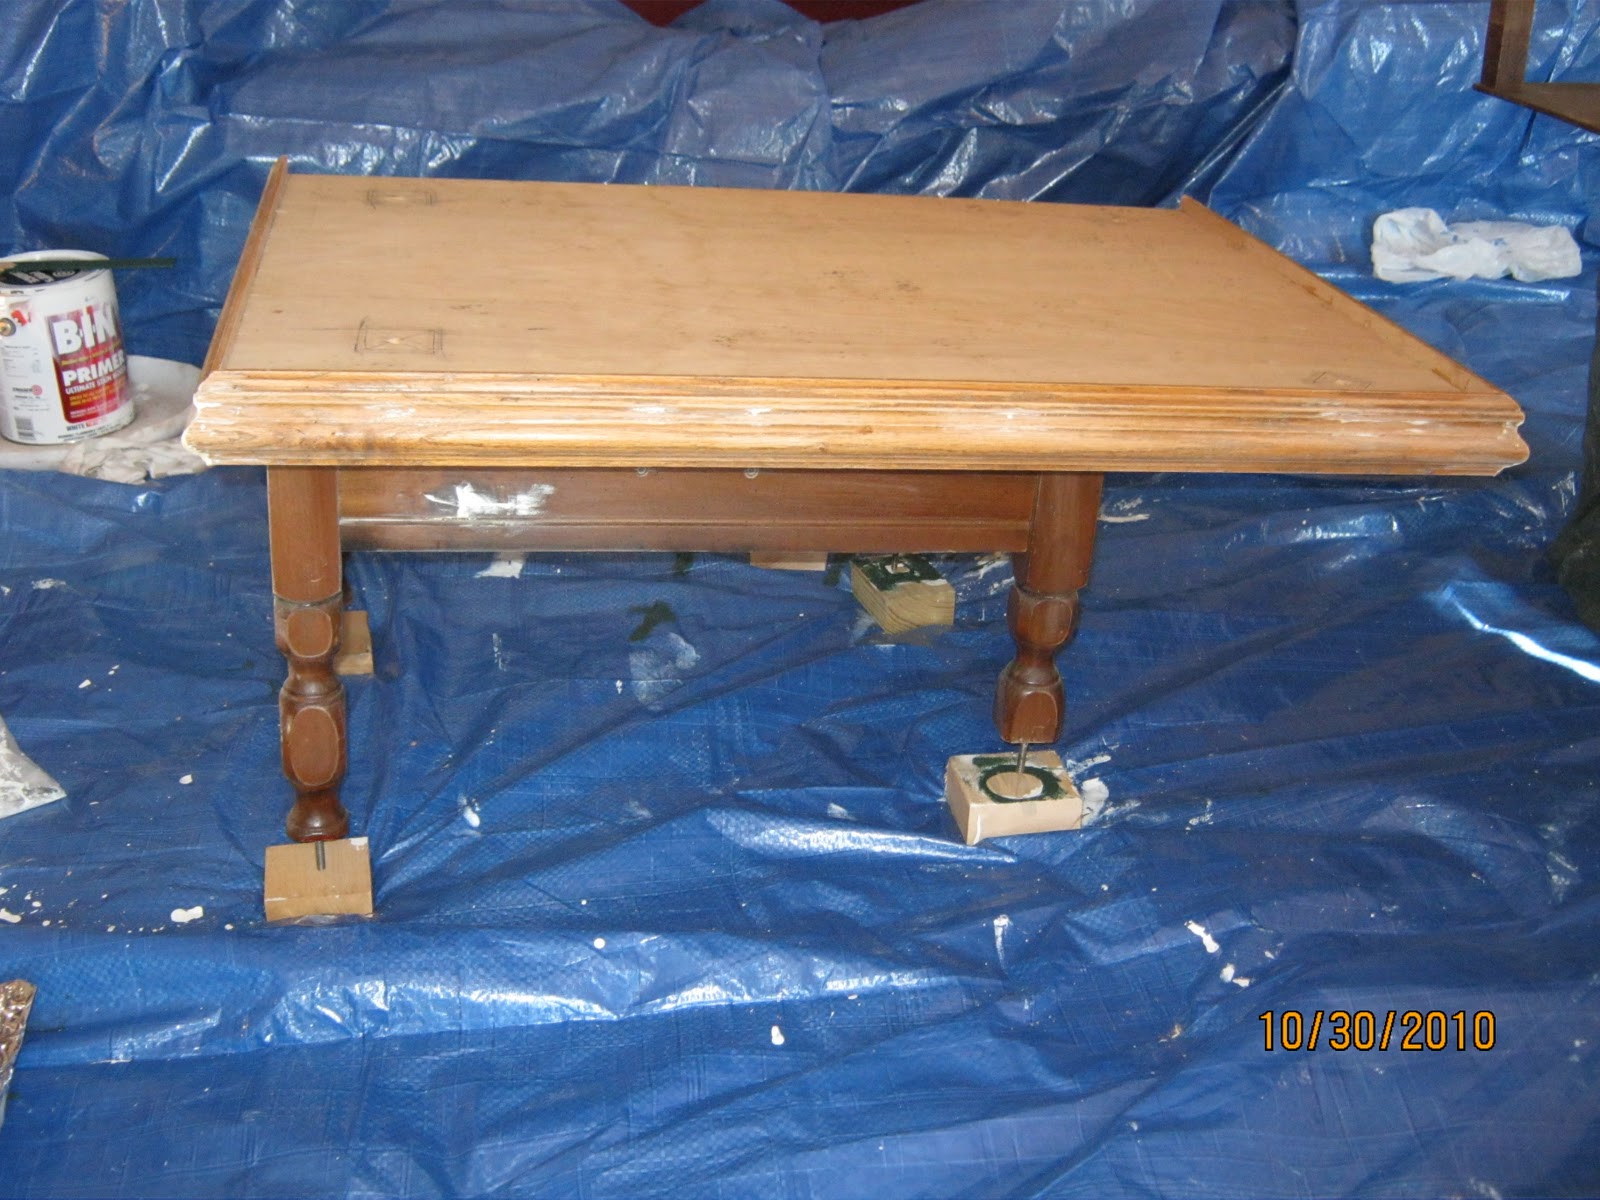


So, here's the first two tables in their final resting place. Once I have it all painted and together, I will put a brown glaze over the whole piece. I did not want to do this separately,'cause I was afraid it wouldn't match up the same.


Finally I put a coat of Minwax Polycrylic, satin finish on to further seal it from moisture.
These are some of the supplies I used. I didn't include the cheapo brushes, 'cause I had already tossed them, before I was ready to take pics, but that's my PURDY brush for the final smooth coats of the polycrylic.


The plant stand has been done now for a couple of weeks, but first I needed to let the paint cure. Then, my Christmas cactus was so close to blooming that I decided to wait with the reveal 'til I had a nice floral display from it. It still has more blooms to open, but I couldn't wait anymore.
Sooooooo.......
Ta-Da!

I brought in the glass block monogram from the deck to display for the winter. I replaced them with a bird feeder for the winter months. I tried to keep everything displayed, garden related, so I have my garden books and magazines, as well as some of my garden trowels in the vases at the bottom. I have a photo of my deck garden from this past summer in the rose frame and the hope is to switch that out each year with the current summer's photo. The tissue paper flowers on the right are from my granddaughter.
I think it turned out pretty well and I am pleased with it. It is a little large for the dining room, but if we ever build our dream house, we'll make sure to incorporate a large enough space to handle it.
I'm entering this in the December DIY Project Party
at
Tables - $21.00
Supplies - $40.00 + lots left over
Labor - several days here and there
Not having my plants pull my ceiling down at midnight - PRICELESS!!
Linking to:


love it, love it, love it, now I want one too. I'll have to beg my husband to make me one as I am not good with wood or wood cutting tools. You did a great job, thumbs up and pat on the back!
ReplyDeleteWow, this is one heckofa plant stand! It looks fantastic. I love the drawers and how it came together. Well done.
ReplyDeletethat is soooo clever and unique! way to think outside the box, tru!
ReplyDeleteYour idea is unbelievably clever! I've never seen anything like it! A great use of old tables.
ReplyDeleteSUCH A COOL IDEA! Great job! I love the price of it all too:)
ReplyDeleteJennie @ CInnaberry Suite
What a creative idea! I love how you pulled it all together with the paint and the rub n buff. Love that stuff by the way! Very, very clever!!
ReplyDeleteI am in love with this--lots of work but oh so worth it!! Thanks for linking up!
ReplyDeleteWhat a transformation! Good job.
ReplyDeleteThe Bavarian Christmas linky party is now open-won’t you come and join us at http://dobermans-by-the-sea.blogspot.com/2010/11/1st-christmas-linky-party-at-dobermans.html and while you are there join the give-a-ways going on.
That is so much fun! I want to make one...how unique. Thanks for entering the DIY Project Party. I am one of the DIY gals! and a new follower.
ReplyDeleteHolly
504 Main
that is amazing! Glad you found my glazing 101 helpful!
ReplyDeleteI wish I had some rockler clamps! :)
good luck in the monthly contest! Thanks for linking up!
gail
What a unique idea, it turned out great!
ReplyDeleteThats fantastic! What imagination! I love it!
ReplyDeleteyou are just so creative. This is incredible.
ReplyDeleteOh, I **** love it ****. Did you see that Dutch design team on our blog a while ago that made these cabinets from mismatched drawers... We'll yours is every bit as great.
ReplyDeleteThank you so much for linking it up with us at our DIY Linky party. Tomorrow we're opening up a new party and you're welcome again to come join in.
Would you be so kind to link back to the blog? There is an easy tool to do so on each linky party page. I would so appreciate this...
Particularly since you're a runner up to being featured soon, that would be very nice gesture on your part...
This. Is. Amazing!
ReplyDeleteGreat project! It made my head hurt just trying to figure out the pieces... you truly have a gift!
ReplyDeleteI found you a My repurposed life--CACN party
Wow! Thats a great little Masterpiece you've got there...Very inventive...beautiful job! btw I wandered over from The Purdy Awesome Party over at thediyclub...Have a great day!
ReplyDeleteWow!! Just... WOW!! This looks amazing!
ReplyDeleteLove your creativity on this project, those tables look awesome as a plant stand! Came over to check it out from Gail's highlight on her catch as catch can party.
ReplyDeleteGood luck in the diy club contest!
OHHHHH MMMMM GGGGG. This has got to be the most clever and creative thing I have seen in my few months in blog land! Awesome!
ReplyDeleteYou have made a follower out of me!! Saaaweeet!
Feel free to come join my blog as well that would be peachy!
http://dejarenew.blogspot.com
take care you clever lady you!
Deb
How fun! Nice job!!
ReplyDeleteWow--amazing. You did a great tutorial.
ReplyDeleteCheri from its so very cheri and the DIY Club.
Congrats on making the Top 10 at The DIY Club!
ReplyDeleteAmy
Such a great idea! I love how it turned out! Super job!
ReplyDeleteRoeshel
I think that is the cutest up-cycled plant stand I have ever seen and I love the color you chose.
ReplyDeleteVery cute plant stand! You guys did a fabulous job! Looks great! Thank you for the comment you left on my blog! I really appreciate it! Very nice meeting you!
ReplyDeleteThis is so cool! I would love to make a small version for my front room, sewing room. . . maybe I'll have to wait and make it when we move somewhere with more room.
ReplyDeleteThat is the most awesome plant stand I've ever seen!!!! If I ever built one like it, tho, my cats would comandeer it as a playhouse, and I'd STILL be in need of a place to put my plants!!
ReplyDeleteThis piece is a lovely piece of furniture that any plant owner would be proud to own. I love it!
We are going to start this project in 2014. I would love to show you a photo of the finished product. You truly have inspired us!
ReplyDeleteI would love to see a pic. Are you planning it for a plant stand or just artistic display?
DeleteYou truly have inspired us! We are going to start this project in 2014. I hope I can show you a picture of it when we complete it.
ReplyDelete