I really like getting feedback and will respond to comments.

So please, won't you leave me some footnotes!

Better yet.......... Become a follower!

I'll follow you back!

Do You See What I See? Check out the images I've found!
Print Friendly and PDF
Showing posts with label FOOD. Show all posts

Thursday, April 4, 2013

Creamy Tomato Soup


101_1591


Creamy Tomato Soup
Yield 4 ½ cups
Ingredients
3 ½ tablespoons butter   
½ cup chopped onion
1 clove of garlic (minced or put through a garlic press)
3 tablespoons flour
½ teaspoon basil
2 cups chicken broth  (I use 1 TBL of chicken soup base added to 2 cups water)
1 teaspoon sugar
2 cups chopped tomatoes (fresh or canned)
2/3 cup half and half
Melt the butter in a saucepan. Add the onion and basil and cook until onion is translucent. Add garlic and sauté for about 30 seconds. Sprinkle in the flour and whisk to make a roux. Slowly add the chicken broth and continue to whisk as the mixture thickens. Cook for at least  1 minute, following the boil; then add the sugar and tomatoes and just bring back to a boil. Reduce the heat and simmer for at least 20 minutes (longer for fresh tomatoes). Just prior to serving, add the half and half. Refrigerate leftovers and reheat as needed.


YUM!

Thursday, January 5, 2012

Betty Crocker 11 Piece Decorating Kit

My daughter and her family got me this for Christmas. I guess she thought I needed some more decorating paraphernalia, since she recently borrowed some of mine and I do seem to be missing some pieces. Anyway,  I had seen decorating tubes like this on the web, but was reluctant to get them, because I thought they might be more difficult to clean.

                    IMG_1238                      

Now, it says it is 11 piece, but in actuality, there are 23 pieces, plus the instruction booklet. They count each bottle, with all the pieces to the cap as 1 piece. Most things you buy nowadays, the cap is considered a piece of it’s own, but potatoes, pattatoes, makes no difference to me.

This is what’s included:

 IMG_1240

3 accordion style bottles

1 tall, smooth bottle                                                                                            

4 (3 piece) caps, which include the bottle cover that screws on, a tip retainer nut, which also screws on, and a tip cap which snaps over the retainer nut

1 spoon spatula

1 flexible angled  spatula

5 decorating tips, including a round #2, leaf #67, open star #16, open star #32, and petal #104

1 instruction booklet

I used it, for the first time,  for a New Years treat of cupcakes. Filling one of the accordion tubes as full as I could, by tapping it to settle the frosting, I could do 5 cupcakes in a spiral style. That’s maybe only a couple less than using a bag, but I did not have to worry about frosting coming out the top, which I tend to have, because I probably am not doing something quite right with my hold.

So, to fill the bottle, use the spoon spatula and start scooping frosting into the bottle, scraping off the spatula on the side of the bottle. Tap the bottle several times on the counter/table and repeat process until you can’t get anymore in.  Screw on the bottle cap, put a tip on, and screw on the retainer nut. IMG_1246

You are now ready to start decorating with one hand holding a cupcake and the other (dominant) hand holding the bottle. Place the end of the tip on the edge of a cupcake and start squeezing the bottle, as you rotate either the cupcake or your bottle hand, whichever feels most comfortable to you. Spiral in toward the middle of the cupcake, keeping the rows tight and stop in the middle and then lift off.

I thought it worked quite well, but here are my pros and cons.

PROS:

Can frost using only 1 hand; I generally use 2 hands with a bag.

Don’t have to worry about frosting squeezing out the top.

If you need to chill the frosting, you can just put the cap on and put the bottle in the fridge for a bit.

Can store the leftover frosting right in the bottle and use it up in a few days, so you don’t have to throw any out or save such a small amount in another container. I used it on donuts a couple of days later.

By soaking it in warm, soapy, it was no harder to clean out than a bag.

CONS:

The flexible angled spatula is pretty useless for scooping up frosting or even doing any spreading. It is just too flexible and I will stick with my metal ones for major decorating. It did; however, work good to scrape out the pleats of the accordion bottle when I was cleaning out the last of the frosting for my donut; not completely, but good enough.

IMG_1244

Would have been handy to have a large round tip for cupcakes, but I already have a couple, so that was no big deal.

The biggest drawback I had was that you cannot use larger diameter tips for bigger open star decorating. What I mean is that I like to use the following tips (4B, 8B, & 1M) when decorating cupcakes, because I have to make less spirals and it is more dramatic looking. These have a larger diameter opening at the base and there is no way to secure them to the bottle. With a bag, you just have to cut a larger hole.

In conclusion, I give this a thumbs up!

I think it will be handier for doing star decorating on cakes where you have a lot of little stars to pipe. I will definitely be using it on my next decorating project. I wonder how writing will work with it. I can’t wait to try it on a cake.

Have A Sweet Day!

Monday, November 14, 2011

Crock Pot Swedish Stew

I was trying to come up with something different for dinner, and was kinda hungry for stew. We’d just had a tomato based stew, so I wanted something different. We like Swedish Meatballs, so I thought why not try that type of sauce in a stew. It smelled great, but the real test was that Hubby said he really liked it and that the recipe was a keeper. I figured I better get the recipe typed up and recorded somewhere, so I don’t forget how I made it, the next time we have it. (I tend to do that; make meals by adding different concoctions, and then forget what I did.) I served it with a slice of buttered rye bread and it was delicious. I hope you like it too!
IMG_0990
Crock Pot Swedish Stew
1 1/2 pounds beef roast or round steak
Small amount oil for browning
Salt, pepper, and garlic powder to taste
1 can cream of celery soup
1 cup baby red potatoes, quartered
1 cup frozen peas and carrots
1/4 cup finely chopped dill pickle
Cut beef into bite size pieces. In a skillet, sprayed with nonstick cooking spray, brown the beef in oil, seasoning with the salt pepper, and garlic powder.  Place the quartered potatoes in the bottom of a crock pot. Add the browned beef next, followed by the cream of celery soup, dill pickle, and peas and carrots. Cook on low  for 7-9 hours or high 4-5 hours. Stir to incorporate anytime after halfway through the cooking cycle.
Alternate ingredients: You can use regular medium potatoes, peeled and cut into 1”size pieces. You could also use fresh peas and carrots, but then put the carrots in the bottom with the potatoes, since they will take longer to cook.

Enjoy!


Linking to:

Visit thecsiproject.com

Monday, August 1, 2011

Baptism Cake And Some Helpful Things I Learned From Pinterest

 IMG_0880 I made this cake for a Baptism celebration we attended Sunday.IMG_0881It’s kind of hard to tell, from the picture,  but I made this in the shape of an open book.  IMG_0882 Since I’m too frugal to by a lot of shaped pans, I improvised. I used a 13x9 pan for the bottom layer. For the top, I cut a 9x9 cake on the diagonal, using the top of the cake for one side and then flipped the bottom over for the other side, putting the thick sides to the middle. I had to cut off approximately 2” on each side of the top layer, so the edge was even. This was my first time making and using fondant and I think it turned out quite well.

So, what did I learn from Pinterest? 

I have a board on my Pinterest page called The Been There, Done That Column where I put the tips I’ve tried and projects I’ve copied. These are the tips I used for this project:

 The Best Tip EVER for filling a pastry bag!! @Chef Mommy

REVIEW:  This totally rocks! I wasted so much LESS frosting and cleanup was easier! I could even switch bags, from a large tip bag to a small tip one, just by wrapping another piece of plastic around the original. The only change I made was to knot the back end; thereby, preventing end blowout.

  How to Make Marshmallow Fondant @Clockwork Lemon

REVIEW: I found that constantly dusting your hands with the sugar keeps the fondant from sticking to them better than the butter did. I used a tsp. of vanilla and it tasted good; much better than any bakery fondant. I did find that you have to use a lot of sugar to get it to the point of non stickiness. When rolling this out, I found it works best between 2 pieces of parchment paper, then stick it in the freezer for a few minutes and it comes of quite easily.

 Quick and Easy Smooth Icing Using A Roller @ Cake Central

REVIEW: How to make a smooth frosted cake with a paint roller. This worked best for me with just the roller. 2nd best was with paper toweling. The wax paper did not work with my frosting recipe, stuck to it. I did not try parchment paper.

Do you Pinterest? It’s a great way to bookmark pictures you find on the internet and full of loads of inspiration. Why don’t you check out my Page and maybe become a follower, if you are so inclined.   And if you need an invite, let me know. I’ll gladly send you one.

Warning box

Monday, February 28, 2011

Surprise!


I threw a surprise party for Gary’s 55th birthday. Too bad he started to get suspicious a couple of days before the party. I really had him going though, until that time. When I sent out the invitations, I sent them out from a neighboring town, but it was on a Saturday and I put them in the outside mailbox. Well, they went all the way to Milwaukee, before coming back here. Couldn’t have worked out better if I had tried! Of course Gary (we) got a completely different invitation than all the others. I set up a fake email address for the RSVP. He was none the wiser, ‘cause he is not computer savvy AT ALL! He was a little suspicious at first, but I quickly squashed that by replying to our RSVP saying it was a party for someone I knew who was moving back to the state after many years gone.

Here’s the invitation others received:   
Shhh!                                                            For    Gary xxxxxxx
This is a surprise party for                         Date  Feb. 20, 2011
Gary's 55th birthday.                                 Time  12:30 pm
We will have an appetizer                         Place  St. Anne's Cafeteria
style buffet and drinks.                                         Main St. xxxx,xx         
This is a Retro Party,                                 R.S.V.P.     Regrets Only                              
so come dressed as a                                                    xxx-xxx-xxxx
black and white TV                                                    If you don't call,
or Movie character.                                                   we'll expect you!
NO GIFTS PLEASE!
 
And the one we received:
For Retro Black and White Party
Date Feb. 20, 2011
Time 12:30 pm
Place St. Anne’s Cafeteria
        Main St. xxxx,xx
R.S.V.P.  By Feb. 13, 2011
    undercoveraffair@ xxxxx.xxx

This is the response we got to our RSVP:
Hi Tru,
I'm sorry I didn't get back to you a little sooner, but I had to check a few things first.
I can give you a little information on the Retro Party.
First of all the clothing does not have to be black and white, just clothing like a black and white era TV or movie character. So, say you wanted to dress as Gilligan, you would wear a red shirt as opposed to a grey shirt. Make sense?
Secondly, we will be serving a buffet type meal.
Although; I can’t tell you who this party is for, because we want it to be a total surprise for the guest of honor as well as the guests, I can tell you a little about why you were invited.
My friend is moving back to the area after many years in another state. With the help of my friend’s family, I am throwing a party for them to reconnect with old friends. During the reminiscing, your name came up as someone who is fun loving and enjoyable to be around. I will tell you that my friend is someone you worked with back in the day.
I do hope you and your husband decide to attend. I am so looking forward to meeting you.
Ruth

So I made it all about me and that really threw him. We were trying to figure out who this person could be and I almost had myself convinced it was a party for someone else. I had the most fun trying to keep him from finding out about the party.
We had black tablecloths , black balloons and black and white streamers. You get the picture; it was an over the hill party. We had a good time!

Here are some pics from the party, plus you can click on the slide show up top for some more.

IMG_0617
The cake I made. I bought some black frosting in a tube which I could put my decorating tips on with the collar. Sweet!

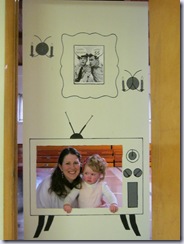
These are some of the people who dressed up in the photo op cut out I made. Not everyone dressed up; there were some party poopers, but those that did enjoyed themselves.
 
IMG_0608 IMG_0604 Ralph and Hank Kimball from Green Acres
Curly from The Three Stooges Mary Bailey from It's A Wonderful Life
and Shirley Temple
Ralph and Hank Kimball
from Green Acres
IMG_0603 IMG_0609 IMG_0610
Ginger Rogers Jethro and Ellie May
From The Beverly Hillbillies
Granny and Jed Clampett
From The Beverly Hillbillies
IMG_0611 IMG_0613
Hogan and Fraulein Helga
from Hogan's Heroes
Wyatt Earp and Ma Barker


Some more pics!

Saturday, January 8, 2011

CUTTING BOARDS

These are the cutting boards we made for our future daughter-in-law for Christmas.


Here they are before oiling.

We bought a scroll saw last summer and finally got it set up to make these.  We traced a couple of my cutting boards onto an oak board for the pattern. When Gary came in with the new boards and asked me if I liked them, I was thrilled. I loved them and told him we may have to make some for me! Gary did the initial sanding on the belt sander and I did a little final touchup by hand. Then I oiled them with mineral oil and after that soaked in, I waxed them with beeswax. That is supposed to close up the pores of the wood some, so bacteria can't get in. I think they turned out wonderful!

Have a "cut-free" day!

Photobucket

Friday, January 7, 2011

ICE CREAM SUNDAE GIFT BASKETS

I made these gift baskets for some friends for Christmas, but they would be appropriate at any time of year I think.


Here's what's in them.
 Apothecary type jars of sprinkles, toasted pecans, and mini M&M's.
Homemade strawberry, pineapple, and hot fudge sauce.
An ice cream scoop and 2 bowls with a vinyl ice cream sundae cutout, I made with my silhouette.

I was going to add 2 bananas, but when I bought them they were green and looked good. After a couple of days ripening, they started looking crappy, with brown bruising areas on them, so I figured the baskets would look better without them. 

The baskets were up in my junk room and I cleaned them up, whitewashed them with some thinned down acrylic paint ,and sponged some gold paint on for accent. One of the baskets was an old Easter basket, so I cut the handle down and glued it into the weaving with super glue. The pink and green showed through the whitewash a little, but I think it just gave it more character. I added some frayed fabric in the bottom of each basket, filled them with the goodies and wrapped them up. The cellophane wrap is some that I bought more than 5 years ago at a white elephant store. I got a whole roll for $1.00 and usually use it at least once for a gift each Christmas. I still have at least half of it left, so I'm good for another few years. The ribbon was left over from my middle daughter's wedding.
They turned out pretty nice, but I'm not sure how long the vinyl is going to last through washing.

Have a sweet day!

Photobucket

Thursday, October 21, 2010

FRENCH SILK PIE - WITHOUT BREAKING THE BANK

This is the post I guested with on 

Thanks, again, Jen!


FRENCH SILK PIE

 
First of all, let me tell you, I don’t always follow the rules. When I first got married, I tried to follow recipes, but when they didn’t turn out the way they were supposed to, I started making my own rules. I couldn’t make a decent pie crust to save my soul, making it the way the cookbooks told me to. I believe Martha Stewart is the one who said about piemaking, “Make it cold and bake it hot”, and you should chill the dough before rolling it out. Well, I’m not Martha and that didn’t work for me, sort of. What I mean is the only chilling I do is after I have the crust in the pan I put in the fridge to chill for a bit…. sometimes. I’ve found for me the best way to make a decent thin crust is to make it only as cool as the water from the tap and keep the dough on the soft side to roll out. I then use a lot of flour to roll it out, to keep it from sticking, to the rolling pin and surface, which happens to be my kitchen counter. When I’m done, I clean it up with a pastry scraper. Handy little gadget by the way. I use it for many things besides scraping/lifting pastry off the counter, such as cutting brownies, rice krispie bars, etc., and to scoop up things off the counter or cutting board. 
So, on to the recipe.

Pastry for Double Crust Pie
Ingredients
2 c. all-purpose flour
1/2 t. salt
2/3 c. shortening
6-8 Tbl. cold water

These are the supplies I used.

Measure out the flour.
I scoop it into a measuring cup on a coffee filter, then  level it off with a knife. the excess can then be poured back into the measuring cup for the next measurement, or put back into the flour container.

In a mixing bowl, stir together the flour and salt.

Cut in the shortening till pieces are the size of small peas.

Measure out 1/2 c. water in a measuring cup. Pour in about 1/2 of this and start mixing with the pastry cutter. Add more water until you get a fairly soft dough, but not sticky. I usually use about 6 Tbl. Discard the rest of the water.

Divide dough into 2 balls. (I like a thinner crust, so I get 4 balls out of this)
Lightly flour the surface you will roll out your dough. I just use the counter top. Place one ball of dough on the surface and flip it so it has flour on both sides.

Start by pressing the ball flat with your hand. Then, roll the dough, flipping it several times so it stays floured and does not stick to the rolling pin, until it gets to be about 6"x10". Then keep rolling from center out to edges changing directions until you have a circle of about 12" diameter.


Roll the dough onto the rolling pin. You may need top loosen it a bit from the counter with a pastry scraper.


Unroll the dough onto the pie plate and adjust it so it is down into the bottom and sides. Cut off any excess dough that hangs past the edge of the pan straight down to the counter. (Set these scraps aside, we'll use them for a surprise). 


Roll under the edges on the dough, just to the edge of the plate and flute the rim by placing your index fingers on the inside of the edge and pressing with one of your thumbs between your fingers. Wherever you have the flute going outward, press down onto the edge of the pan. This will help to keep the crust from tipping into the pan as it bakes. Perforate the crust all over the bottom and around the sides. this will keep the crust from shrinking too much and bubbling.


Repeat with the other balls of dough and refrigerate while you prepare the dough scrap cookies. 
Surprise! 
Place all the dough scraps on a cookie sheet and sprinkle with cinnamon sugar. Bake these in a 450° oven, on the top rack, for 5-10 minutes. Watch these closely, they bake fast. Cool on a rack and enjoy.


After the cookies are done, you can bake the pie crusts, likewise @ 450° for 5-10 minutes. Again watch closely. I did the one on the left with beans placed on a coffee filter to weight the crust down and keep its shape. I don't see enough of a difference to warrant this extra step. Besides, I had to remove the beans when the other crusts were done and bake it further, because the crust wasn't done on the bottom. Let these cool  before filling.


French Silk Filling

Ingredients
2 c. powdered sugar
1 1/2 sticks BUTTER (softened slightly)
1/2 c. semi-sweet chocolate chips
1 t. vanilla
3 eggs
(2) 8 ounce containers whipped topping, one for each pie


These are the supplies I used
Melt the chocolate chips in the microwave for about 1 minute, stir until smooth, and set aside to cool. Do not use milk chocolate chips, as I've found they do not melt well. If you want a milder chocolate taste, use dipping chocolate,(which is what I had to do, 'cause I was out of semi-sweet chocolate chips!) If you need to do this, it is 3 ounces.
With your mixer, beat together the sugar and butter until fluffy. With a Kitchenaid, this only takes a couple of minutes; a hand mixer will definitely take longer.
Stir in the chocolate and vanilla (yes, I make my own vanilla extract) and thoroughly mix together.
Add eggs, one at a time, beating on high speed after each addition and scraping down sides of the bowl. 
Here's what it looks like when you're finished. Mine looks quite light, again, because I used dipping chocolate.
Fill your baked pie crust with the filling. It doesn't look like much there, but remember, whipped topping has to go on top yet, besides this is a rich pie and you don't want the filling too thick. If you like rich pies, by all means, make only one pie out of this as the inspiration recipe called for.

Cover with plastic wrap and refrigerate for an hour or so, until the filling is firm before putting on the topping. You can keep this for a few days in the fridge without topping and apply that just before you serve it.

You can either spread whipped topping over the whole pie and garnish with chocolate shavings (I shave mine off a block of dipping chocolate).....
Or you can get fancy and do stars with a large star decorating tip. If you're not handy with bag decorating, you can use aerosol whipped topping instead.
Can you tell which one I'm giving to a friend?

Linking to:


Love the Pie

Photobucket