I really like getting feedback and will respond to comments.

So please, won't you leave me some footnotes!

Better yet.......... Become a follower!

I'll follow you back!

Do You See What I See? Check out the images I've found!
Print Friendly and PDF
Showing posts with label Toys. Show all posts

Tuesday, May 3, 2011

Baby Shower Gifts

I attended a baby shower a couple of weeks ago. The mom-to-be likes frogs, so I tailored my homemade gifts to go with that theme.
IMG_0699
Hooter Hider
IMG_0701
I pretty much followed the tutorial here, except I used a metal fastener and I always double seam, to make sure the seams are not going to rip apart easily.
IMG_0699
Frog Hat and Booties
For the booties, I used my standby Best Crochet Slippers pattern, but adjusted the pattern to make them smaller, by using a smaller hook, only one strand of yarn, and less rows.
IMG_0712
For the hat, I followed the pattern here, except I did the eyes a little different and I used 1/4” ribbon instead of yarn for the contrasting edge.
Burp Cloths
IMG_0703
This is the tutorial I followed, roughly. Mine had a more rounded shape on the ends.  To achieve this, I used a dinner plate to trace a pattern of 2 circles, then joined the circles with an inside arc. I used bar towels for the absorbent backside.
Ribbon Tab Toy
IMG_0708 IMG_0707
Here’s what I did:
1) I basically just traced a circle with a dinner plate onto 2 fabrics, 1 cotton and the other fleece and cut them out.
2) Cut various lengths  of ribbons ranging 2-4”.
3) Fold the ribbon strips in half and pin them between the the 2 circles of fabric right sides together, ribbons in toward the middle. 
4) Sew around the edge of the circle with a 14” seam, leaving about a 3-4” opening for turning, (leave out 1 ribbon until after it is turned and stuffed). I always double seam, to make sure the seam is sturdy. Turn it right side out.
5) Wrap a large bell , or several small bells, with poly batting. Put about 1/3 of the batting in through the opening, then put in the wrapped bells and finish stuffing with poly batting.
6) Slip stitch the opening closed along with the last ribbon.
Pacifier Leash
IMG_0706Follow the tutorial here 
Closet Dividers
IMG_0709
For these, I made a template out of cardboard, traced them, and cut the shapes out of foam board. I covered them with contact paper and used acrylic craft paint to color around the edges. I cut out the letters on my Silhouette, applied them, and Bob’s your uncle. Easy Peasy!
Froggy Bank
IMG_0713 IMG_0715 IMG_0718 IMG_0720
I made this bank from a recycled coffee container. It was decaf, since that’s the kind that comes in green.
Here’s what I did:
1) Removed the label with Acetone. They do not make paper labels anymore, but paint them on, so it is a little more difficult to get a label free surface.
2) Clean the container up real well. I place newspapers inside to get rid of the coffee smell. Most of it was gone the next day
3) I cut out the frog and phrases on my Silhouette, but you could easily draw these on with a permanent marker.
4) Cut a slot in the top. I made a frog face (with no mouth) on my Silhouette and placed it so the slot is the mouth and the ears stand up on the edge. I left the backing off on the vinyl behind the ears so they would not stick to the container.
The irony of this is that the container came from the mom-to-be in question!  In fact she asked me what I was doing with it. I told  her I couldn’t tell her and she left it at that.
Gift Bag
IMG_0704
All these goodies went into the gift bag I decorated with a frog.
 Have A Hoppin’ Good Day!
Technorati Tags: ,,,

Thursday, October 28, 2010

TRAIN-ACTIVITY TABLE / TOY BOX

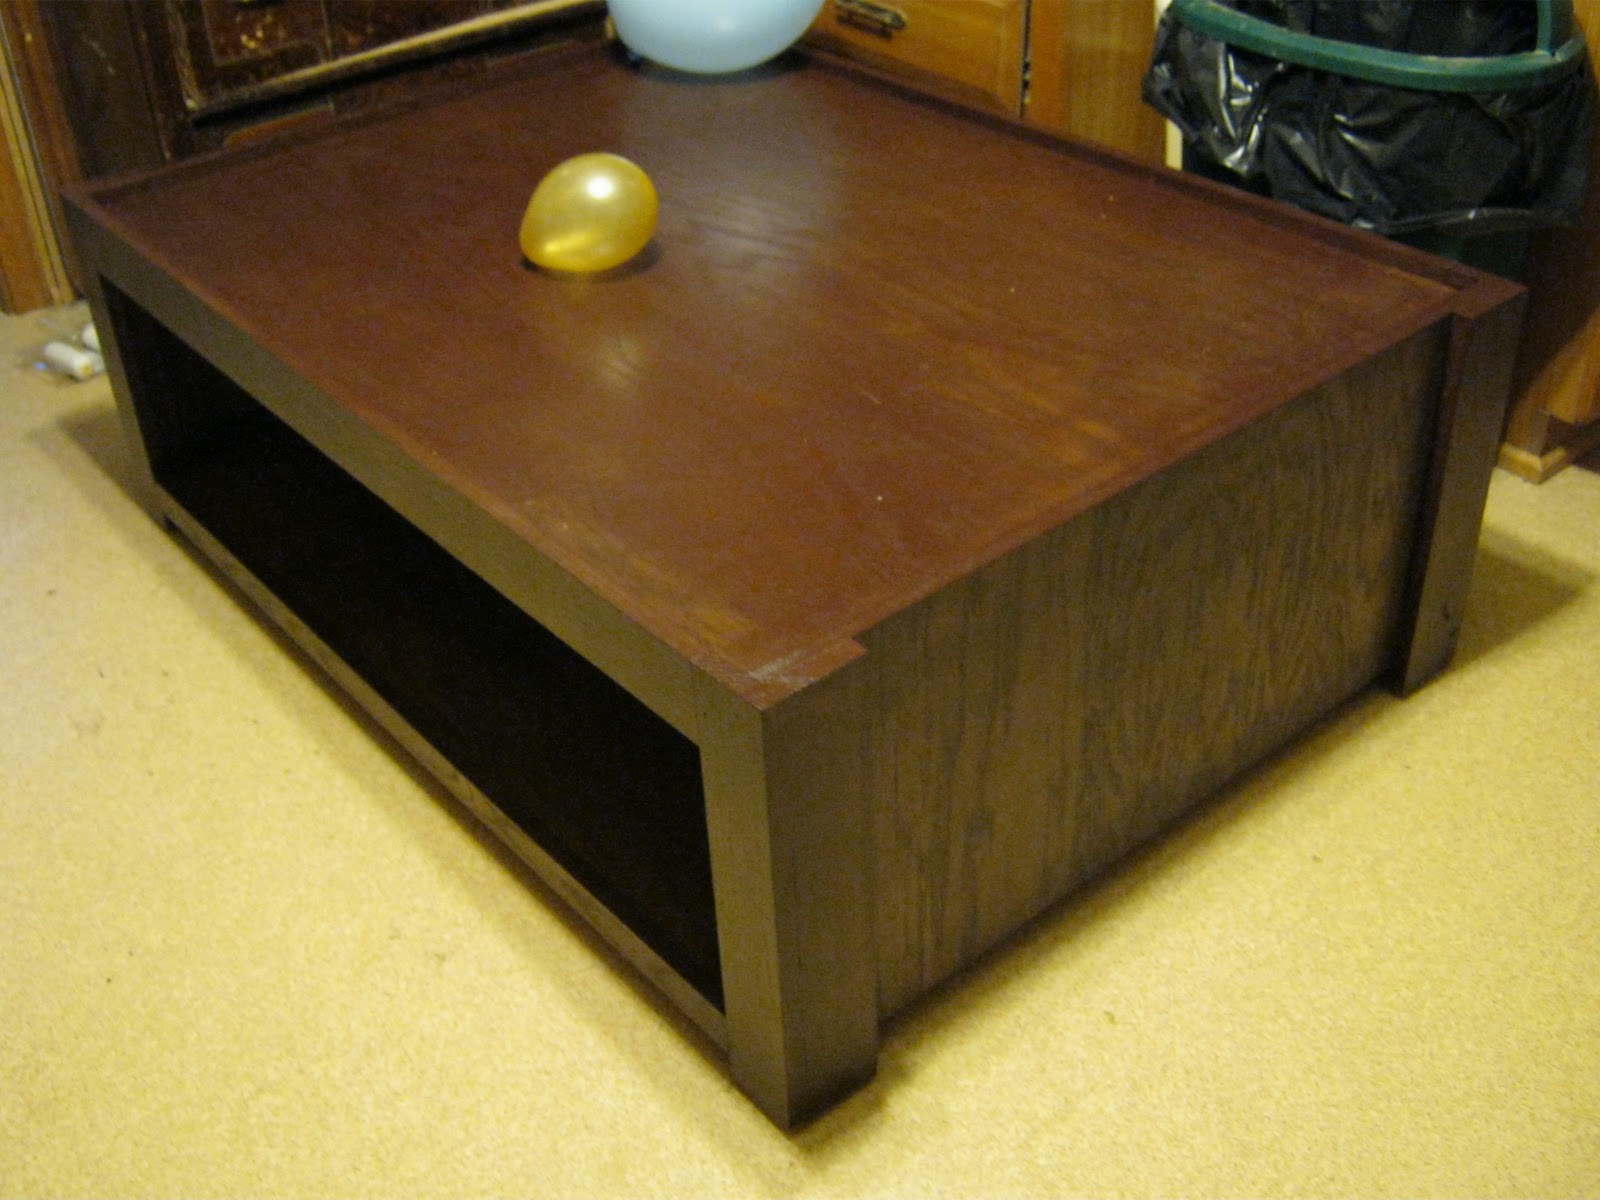
This is the train-activity table we made for our Grandson.

My daughter plans to put baskets on the bottom shelf to hold toys.
She told me when they got it back to MN, (took up almost the whole back of their Suburban, BTW), that the road carpet that they have almost fits inside the top. It goes up the rim some.

I don't have a complete tutorial for this because Gary helped me to make it, so that it was from both of us, for Henry's birthday. He doesn't like to take time to take pics and doesn't like to be in any pics I take.

Although; this is what we did.

You can see the design I came up with HERE on my design blog. It is made of oak faced MDF and oak boards. We made it out of these materials because #1 Jessica wanted it to be stained rather than painted, #2 oak looks so much better stained than pine, and #3 we already had some oak MDF here from a project that we decided to go in a different direction with and we had leftover oak boards from remodeling our bedroom.

These are the only pics I got to take during the process. It is of the jig we first had to make to cut the large panels straight with the circular saw. 
See how the saw runs on the jig instead of on the panel?

We attached a 1x4 pine board to a piece of Melamine paneling we had leftover from the mudroom bathroom over 20 years ago. The Melamine allows the saw to glide over it and not bind the way it does if you just run the saw on the panel, butted up to a clamped on board.


We started off cutting the MDF for the shelves and sides. We then cut all the legs to size. Gary glued and nailed the legs together. We just did a butt joint, otherwise we would have had to add trim to the corners so they wouldn't be sharp. Once he had all the legs done and sanded, I built the sides, by first gluing and nailing the corners (legs) and then adding the shelf supports. When the sides were done, I placed the shelves in and glued and nailed them to the sides. Gary then attached the front and back shelf supports under the shelves and to the legs. We then added the trim pieces on the front and back to cover the MDF edges as well as the shelf supports and give a lip to the top shelf , so things can't roll off easily.
The final steps were the satining and finishing. Do not believe it when the can says you can apply  stain at 55°.I was doing this in the garage and it was the upper 50's and the stain did not go on well at all. We had a space heater blowing onto the project to help the glue dry and where it was a little warmer, the stain went on better. Maybe it's because it was a water based stain, but Jessica didn't want oil based because they had 6+ hours of driving home with this thing in an enclosed space. For the rest of the finishing we took it into the house, in the mudroom, and finished it out there. Anyway, I was out of stain and it wasn't dark enough, so I applied some brown paint I had leftover from the inside of Blake's toy box. I remembered that that paint had acted more like stain because it didn't cover in several coats and let the grain show through. That was all it took to get the color we wanted. I followed with 2 coats of Polycrylic on the whole project and 3 coats on the shelves which would get more abuse.
All in all I think it turned out quite well, considering we had to work this project in while trying to fill silos. 

Have A Fun Evening!

Photobucket

Tuesday, September 21, 2010

TRAIN/ACTIVITY TABLE DESIGN

This is the design I have in mind for Henry's Train/Activity Table.

Jessica will get baskets to slide through on the bottom shelf, to hold toys.
We are still trying to decide if it should have casters on the bottom to roll the whole table around. 
What do you think, Jessica? Do you want casters?

I was thinking for Christmas, maybe I would make a reversible town/farm insert to go with this. 

Some thing like this...
Town & Country Road Carpets Set of 4
Only painted on hardboard or plywood.
Or, maybe I'll paint it on indoor outdoor carpeting, but I think the board idea would work better for "driving " cars or trains on.


TRu04